Showing posts with label accessories. Show all posts

Wednesday, 2 September 2015

It's In The Bag!

Picture the scene…
I settled myself in my cinema seat, switched off my mobile phone and then zipped my bag right up into infinity. Yep, the handbag that had been hanging on for dear life for so long, had finally given up the ghost. 

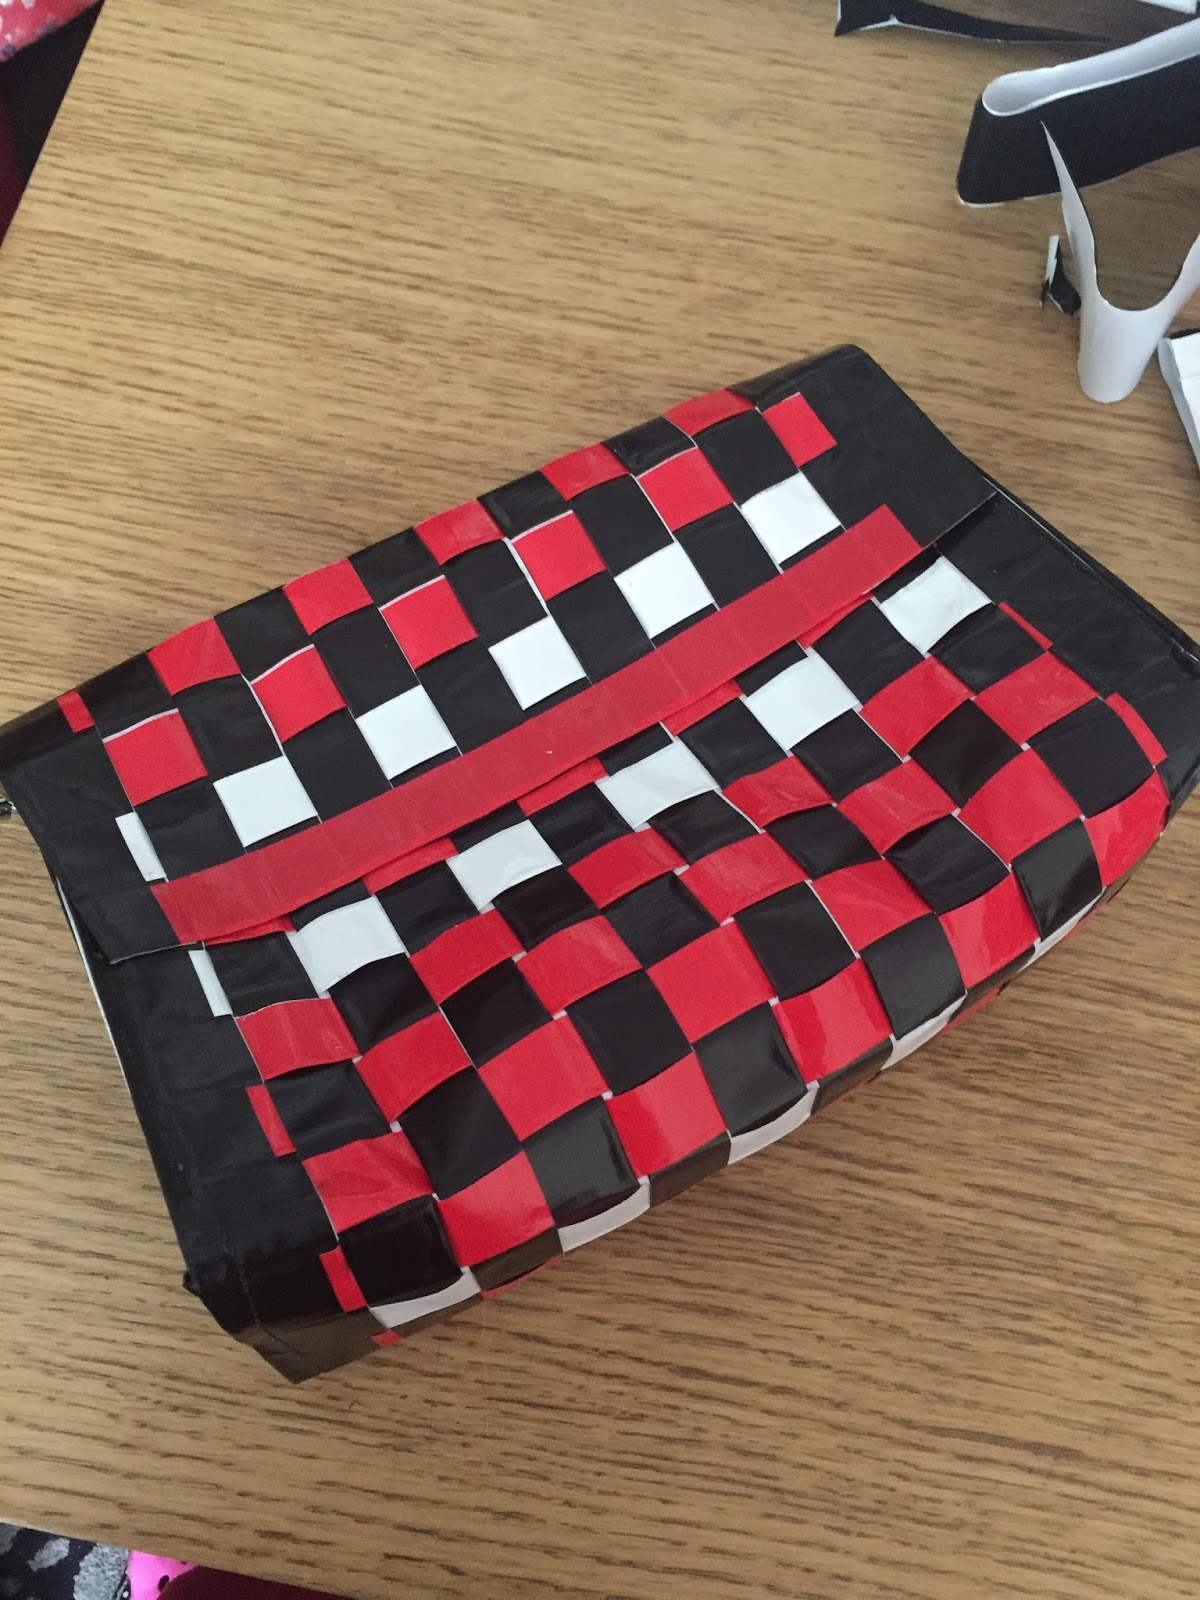
Luckily for me I had bookmarked a tutorial for a duct tape bag. I had planned to make it ages ago, so the three rolls of tape were already waiting - all I had to now was get on with it. 

I deviated from the the tutorial a little as I wanted to use the removable strap from the the other handbag, and I also wanted to make sure it was stronger than something held together with average adhesive. So I cut a couple of two inch pieces from a rejected tape strip, created loops and sandwiched them between the layers of tape that formed the sides.  I only had one D ring left on the original bag, so I used  a keyring I had been given as a Xmas gift for the other ‘D ring’.  I then machine sewed them in place to increase the tensile strength. 

I also made sure that I machined sewed the side panels to the main body of the bag, after initially holding everything in place with tape: I treat my bags in a fairly rough manner, and had to ensure I was creating something that wasn't going to fall apart after a couple of uses. 


I'm not going to lie; preparing all of those duct tape strips was time consuming and the bag took me around 5 hours to complete, (and I had to hand crank the sewing machine A LOT to get the needle through the layers of glue!) but I was really pleased with the results.

Pictured: patience...
I added the pin badge (from one of my husband’s suits) to the flap, partly for decoration, and partly because I was having trouble distinguishing the front from the back - I thought I was being totally random with the white strips: turned out that they ended up creating a back and front symmetry…


Here's the link, again, if you want to try making your own: https://diannadesigns.wordpress.com/tutorials/woven-duct-tape-purse/


By the way - the film I went to see was ‘Me, Earl, and The Dying Girl’, and I cannot recommend it highly enough! 


Thursday, 17 January 2013

Watch it!

Oops!
I have a bit of an annoying habit of fiddling with my watch when I'm feeling a tad agitated.  Needless to say, sitting next to the head of department at a recent work training session left me a little more agitated than usual and the strap fell apart.
To be fair, it was a fairly cheap watch to start with...

Anyway, I needed a quick and easy solution to my 'lack of watch strap' problem so I decided to make a replacement.  If you, too, wish to make a replacement watch strap, here's what you'll need:

Two pieces of scrap material (long enough to go around your wrist one and a half times. One will be the top fabric, one will be the lining)
Matching or contrasting thread
Optional interfacing (I made mine without)
Button(s)

Mine has single button closure, but feel free to add as many buttons as you can fit on the thing!

Let's get that watch on the wrist!

1. Measure the circumference of your wrist and add at least 1 & 1/2 inches to that number.

2.  Decide how wide you want the wristband to be.  I wanted mine to be more of a cuff so I made it about 2 inches wide, excluding seam allowance.


3. Pin the top fabric scrap to the lining fabric scrap and draw a rectangle the length and width of your measurements adding a 5 mm (or 1/4 inch) seam allowance.


4. Cut out both pieces together.  (N.B. If you are using interfacing, this is the time to add it to the wrong side of the lining fabric.) Place the fabric right sides together,  pin and sew along three of the four sides,  leaving one of the short sides open for turning.


5. Trim the corners of the strap then turn right side out.  Fold the remaining raw edge under.  Top stitch around the outside of the entire strap, closing the last edge in the process.


6.  if you didn't use interfacing, here is where we strengthen the strap.  If you did use interfacing you can skip this step entirely if you so wish.

Stitching always helps to stabilize a fabric and as I didn't have any interfacing on hand this was my preferred choice for making the strap a bit more sturdy.*  I simply stitched diagonally along the length of the strap until I got to the bottom.  I then did the same thing going the other way which creates a diamond pattern.


Trust me, there ARE diamonds on here...


7.  Now you need to wrap the strap around your wrist and decide where you would like the buttonhole to be.  Mark with a pin or tailor's chalk.

8.  This next step can go one of three ways:

(i) If you have a 'one step' buttonhole stitch on your machine, simply change to the buttonhole foot and put your chosen button in the correct place and let the machine do the work.

(ii) If you have a 'four step' buttonhole stitch you may need to ensure that you mark the width of the button on the fabric to ensure that the hole ends up being the correct size for the button you're using.

(iii) But, if you have the patience of a saint, you could hand sew the buttonhole using satin stitch.  Just ensure that the size is marked on the fabric as in the step above.

It should end up looking like this:

I'll give some leeway to the hand stitchers...


Once the buttonhole stitching is done you can carefully snip the buttonhole open (this is best done with very small scissors).


Now sew on the button!

9. Place the strap on your wrist and decide where you want the watch face to sit.  Mark where the top and bottom of the watch face rests with tailor's chalk or an air vanishing pen (or pins if you're feeling a bit 'Jim Rose'!).


10.  Hand sew the watch into place around the bars at the top and bottom. 

This is a really crappy pic, I know. Sorry....


And we are done!  Ta da! (Let's see how long this one lasts!)


* You could add a third piece of fabric as a stabilizer.