Showing posts with label easy. Show all posts

Wednesday, 22 July 2015

Smells Like...

I realised that I needed a deodorant that did more than just sit on the skin, smelling of flowers, that I could use immediately after roller derby training. And, of course, I HAD to try to make it myself.  I may well concede defeat in the future, but for now, I’m going to road test  the hell out of this…

There are a lot of recipes online, and many of them seemed to use witch-hazel as the base, with essential oils added for antibacterial properties and fragrance.

I based my recipe on this tutorial but left out the Aloe Vera, because I’m one of those people who gets a mild allergic reaction from using the plant topically.

That's bicarbonate of soda on the spoon...


The bottle I planned to decant the deodorant in was quite small, so I halved the ingredients; I also messed around with the essential and fragrance oils until I felt as though I had the right combination of scents balanced with the right amount of bacteria fighting elements…

So, I used:

1/4 cup of Witch Hazel
1/8 Tsp Bicarbonate of Soda (a natural stench killer!)
5 Drops of Tea Tree essential oil
5 Drops of Clove essential oil
10 Drops of Cold Pressed Lemon essential oil
15 Drops of Musk fragrance oil

There is actually some Witch Hazel in the bottom of the beaker!


This mix creates a unisex (or even slightly masculine) scent, but definitely not a feminine one, which is fine by me - I sweat a hell of a lot during training, so I wanted something with a ‘robust’ fragrance.

However even though I halved the initial ingredients, I still ended up with LOADS of this; so I had to fill a few more bottles than expected.  I’ll keep the cutsie ones, and give the less girly looking bottles to Mr Ponchos…


You can find the girly bottles here


So far it has served me well during a workout - I hope it keeps doing its job after training 

Tuesday, 14 January 2014

Shake your pom poms!


This is an easy (if somewhat time consuming!) crochet project that won me a second prize in the Instructables Fibre Arts Contest. (Yay!)

It all starts with one giant ball of wool...


This is the full list of what you'll need:
A fair amount of wool (I used a giant ball 400g. 840 metres/920 yards) 
A size 5 (H8) crochet hook
A sewing needle
Matching thread and...

Monumental patience

 I call this an ‘easy challenge’ because it only takes a few minutes to learn the skills to make the snood, but the project can (and will) be time consuming. 


We start by creating a long chain of stitches.  If you have never crocheted before, here’s a basic instruction on how to do so.  I wanted my snood to be long enough to be looped twice and still retain a certain amount of ‘drape’, so, I made a chain three times the width of my shoulders.  (You really should aim for an odd number of stitches, but I always get distracted and lose count!)


Once you have your chain you are going to wrap the yarn around the hook once and insert the hook into the eighth stitch from the hook.  You are now going to wrap the yarn around the hook once, again, and then pull the hook out of the stitch.  You should now have two loops on your needle.  Wrap the yarn around the hook and pull it through two of the loops. You should (again) have two loops on your hook.  Wrap the yarn one more time and pull it through the remaining two loops.  Congratulations, you just did a double crochet!  Now do two chain stitches and your ready to work along the row.


With your two chain stitches completed, start the double crochet process again in the third stitch away from the completed double crochet.  This row is the one that takes the longest as it’s the one that requires the most amount of concentration - it gets easier as time goes on!  

When you get to the end of the row, you may find that you have more or fewer chain stitches to work with (if you weren’t counting them), just try to keep the stitch as even as possible in relation to the other stitches. 

When starting a new row, chain five and double crochet into the top of the first double crochet.  Then continue as before - chain two; double crochet into the top on the the stitch below.  When you reach the end of the subsequent rows, give the corner a little tug to ensure that you’re aiming your hook in the right place - it’s really easy to accidentally change the shape while turning.


Let’s have a quick recap of the double crochet. Wrap. Poke. Wrap. Pull. Wrap. Through two. Wrap. Through two. Chain. Chain.

Now, all you have to do is KEEP GOING for about twenty rows.  You will probably feel as though you’re not making any progress from about row ten, but it’s purely psychological ;-)


 Once you’ve done the long haul, tie off the piece by extending the loop, cutting the work away from the ball of yarn and pulling the loose end through the loop.  Then intertwine the tail of the yarn along one edge of your work.  The easiest way to do this is with a tapestry needle, but, if you don’t have access to one, you can use your crochet hook to do the same (I did have a tapestry needle, once, but sometimes tools get restless and feel a need to ‘move on’, and they leave without saying goodbye…)


Now that the crocheting is done, it’s time to start on the pompoms.


For the size of pompom I have on my snood I used a regular sized tin can as a template.  Draw around this, twice, onto thick cardboard.  I used a seam gauge to ensure that I kept the inner circle even.  Cut these out and your template is ready.


Place the two circles together, cut a length of yarn and start wrapping it around the edge of the circles.  Keep adding yarn until you can no longer see the cardboard.  Carefully snip along the outer edge and cut another, shorter piece of yarn from the ball.  Slide this shorter piece in between the two pieces of cardboard and fasten with a knot.  Then pull each piece of cardboard away, and you should be left with a fluffy ball!  Trim off any really scraggly untidy bits and repeat… And repeat…And repeat… 


Whee!


I ended up using about twenty pompoms, but I made them in batches so that I could start sewing them on when the constant doughnut wrapping was starting to grate on my nerves.  Which ever way you chose, you will eventually need to sew them on to one of the long edge - for this you will just need a regular needle and thread.  Be sure that you are catching enough of the pompom when attaching them to the snood.


Did I not mention that you’d need patience?

Once all the balls are on we can close the loop.  I waited to do this bit because I wasn’t sure if I wanted to add a twist before closing, or to keep it flat.  I chose flat, but you can place a twist in easily if you prefer.


We close the loop, essentially, the same way that we intertwined the tail into one of the edges.

And we are done!


Friday, 11 May 2012

So Hammy...


Do you ever get those moments when you've worked on something really simple, but you just can't help being 'pleased as punch' about the results?  Well that's exactly how I felt when I made this tailor's ham.


I used this pattern from Sewing Princess and, foregoing the traditional sawdust (as I don't really have much of that lying around since I quit the circus) stuffed it full of fabric scraps.

It's a really quick make as well, if you have your scraps to hand and will prove its worth every time you press a dart or princess seam!

Hooray for the HAM!


Friday, 24 February 2012

Shift it!

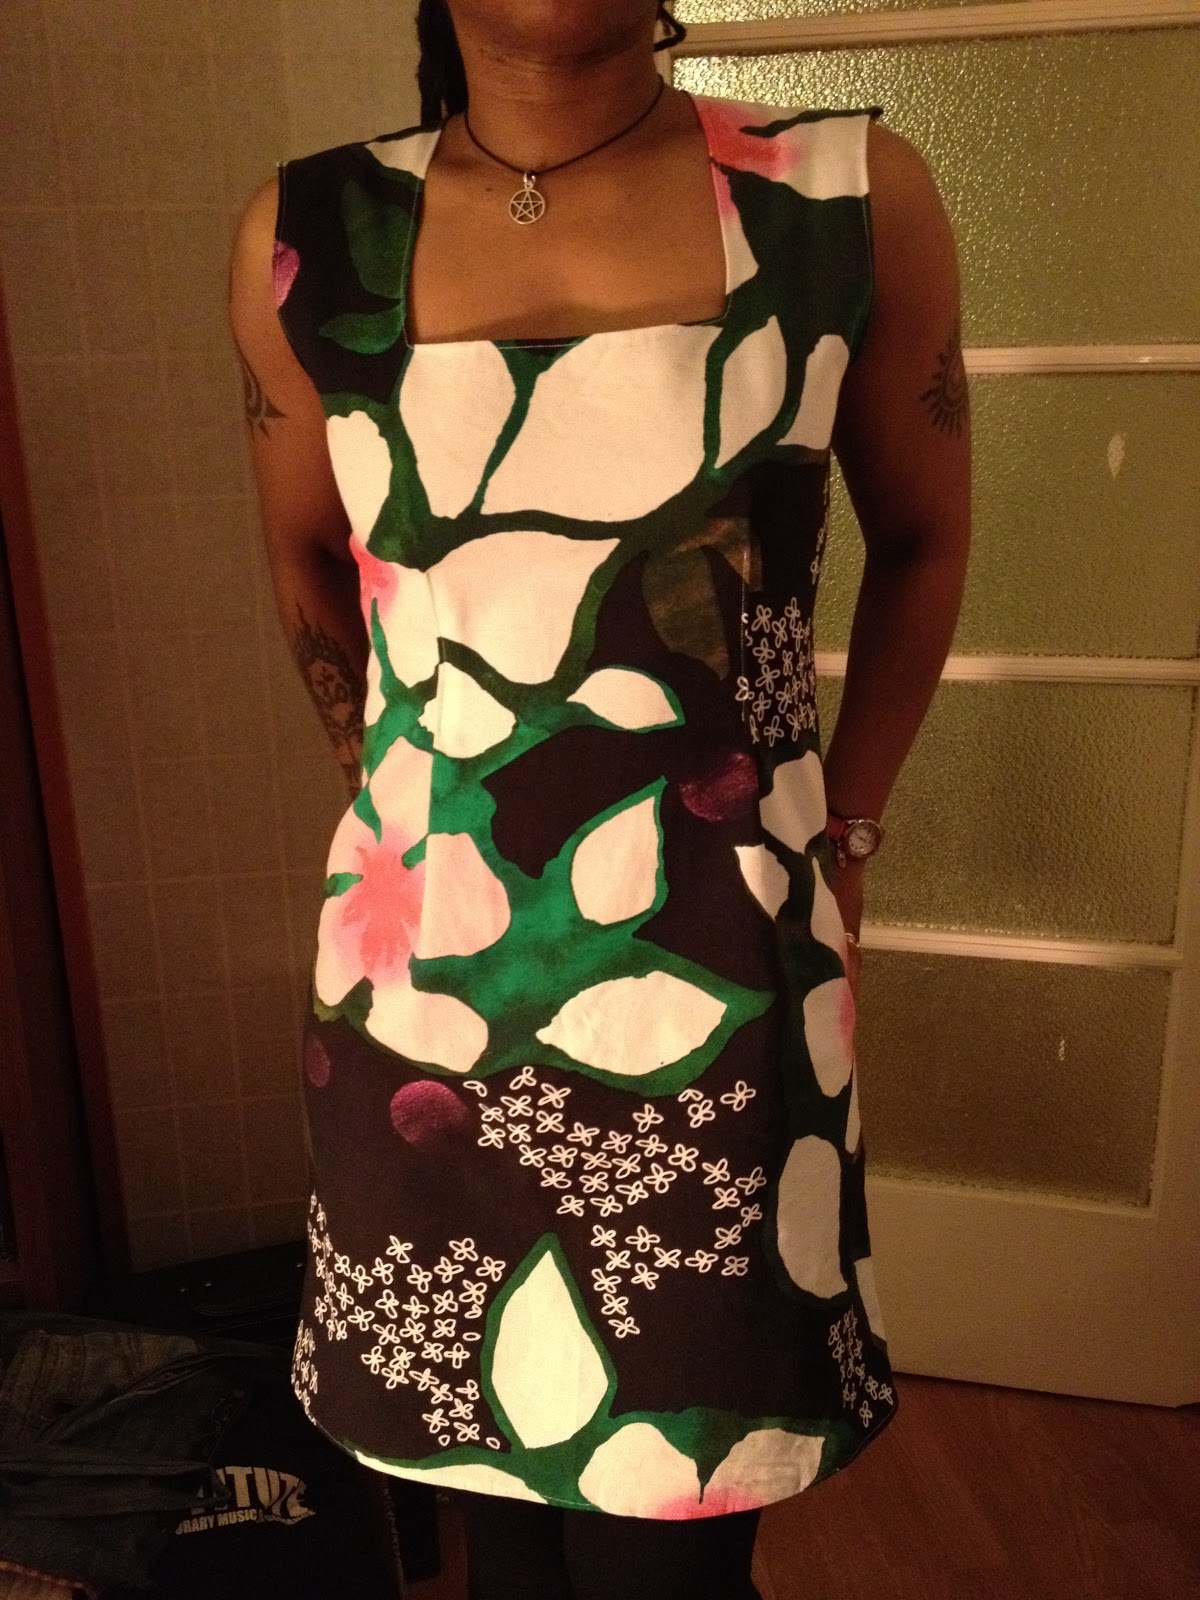
This is a tutorial for a really easy, and super cute, 60's style shift dress.

The pattern has been cut for my shape and size (which is roughly a UK size 12) but it will need some adjusting for each individual, so be sure to make a toile before cutting the pieces from your main fabric.

First thing to do is print out the pattern provided in this link and you're ready to begin!

I used half an inch seam allowance, with exception of the back seam, where a full inch was used to accommodate the zip.

Cut the front pattern piece on the fold of the fabric.


That's just a regular dumb bell weight...
Cut one back piece, from the wrong side of the fabric, with the armhole facing your right; then cut a second piece by turning the pattern piece over so that the armhole faces to your left.


Pin and sew the back pieces to the front piece, making sure that the shoulders are aligned.  


You should end up with something looking rather like this:


Now is the time to add the darts or pleats.  You will want to start from just under the bust and go down to your natural waist.

I chose to use use pleats as the material I used was, essentially, upholstery fabric and wasn't going to drape well without some help.  The darts or pleats in the back are down to your discretion - the material I used had so little 'give' in the weft that I couldn't make it too fitted.... 

You can find a 'how to' for darts in this previous tutorial.


Now you need to measure and mark where your zip will sit along the back seam. (If you have quite heavy material, I would suggest that the zip reaches the bottom of your rib cage, at least.)


(For those of you who have trouble with zips, here's a brilliant video tutorial from Threadbanger) plus more detailed instructions in my pencil skirt tutorial.

Sew the back seam, making sure to use a basting stitch where the zip is due to sit.
Open up the seam and press.


Pin the zip into place and make sure you switch to the zipper foot before sewing.


Once the zip has been sewn into place, cut open the basting stitches with a seam ripper or embroidery scissors.

That's probably the most difficult part over!


(Including the hemline that I forgot to take a picture of!)


And you finish with something that looks rather like this: